Hill
walk routes to climb in SW Scotland - also coastal paths and National
Scenic Areas with maps, pictures and other useful information based on
extensive local knowledge
The
Dungeon Hills - Page One

| Hill
walk routes to climb in SW Scotland - also coastal paths and National
Scenic Areas with maps, pictures and other useful information based on
extensive local knowledge |
|||||||
| The
Dungeon Hills - Page One |
|||||||
|
|||||||
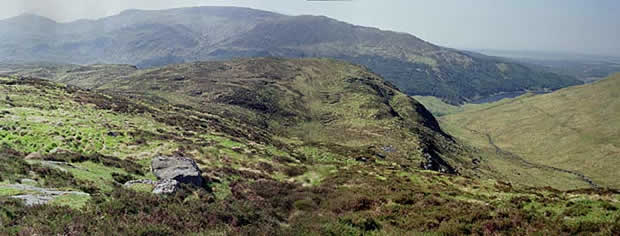
| The picture below is a view from the Rig of the Jarkness back down towards the start of the route at the car park by Loch Trool (right middle ground). The Gairland Burn is quite visible running down through the valley on the right. Also, the path up into the valley of the Gairland Burn from Loch Trool is visible to the right of the burn and higher up the hill. This is the route taken onto the Rig of the Jarkness. The Gairland Burn is crossed near the bottom right of the picture to gain the point where this picture was taken from. The Hills in the background are the Minnigaff Hills. | |||||||
|
|||||||
|
|
||||||
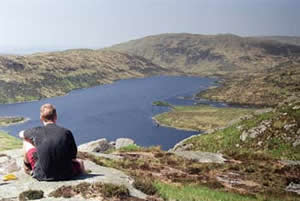
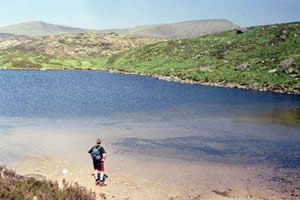
| The picture above is taken at the start of the climb up from Loch Valley to Craignaw and overlooks the loch with the Rig of the Jarkness on the left and the Buchan Hill Ridge beyond. | This shot was taken just before the previous shot looking along Loch Valley towards Benyellary and the Merrick. | ||||||
|
|
||||||
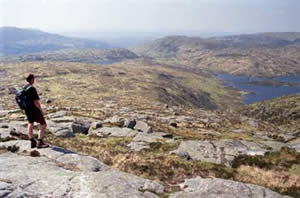
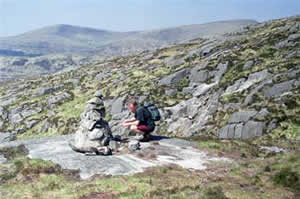
| We are now much further up towards Craignaw and the loch (on the right) we are looking down on is Loch Neldricken, although Loch Valley is still visible, left of centre. The end of our route will be along the top of the ridge which you can see beyond the loch - Buchan Ridge - which we noticed in the picture above this one, and which we also use onto Merrick in another walk. | We are now nearly at the summit of Craignaw - again looking towards the Merrick. The cairn that Mark is looking at is a monument to the crew of an f1-11 who died in a crash here. There are many crash sites in these hills, though few with such a spectacular view. | ||||||
|
|
|||||||